


Table of Contents
Assign flow rates to all stationsAssign flow rates to individual stationsAssign flow rates through Learned FlowLowering a station’s flow rateStations without an assigned flow rate (ASF) will not irrigate. Flow rates can be assigned to individual stations, all stations, or through Learn Flow.
All pipes that provide water to a station must be able to support the station's assigned flow rate. To resolve this, either increase the max GPM of the affected pipes or ensure that the station's flow rate is correct.
To assign flow rates to all stations
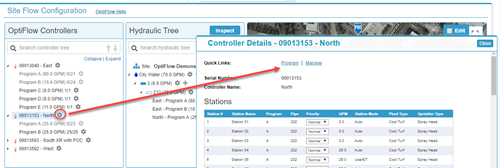
1. Within the Controller Tree, click the gear icon next to the controller name/number. The Controller Details page displays.
2. Next to Quick Links, click Program.
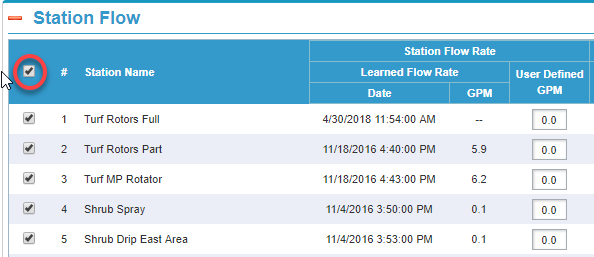
3. The Program Controller page will display. In the Station Flow section, assign a flow rate to all stations by first clicking the box in the blue header bar.
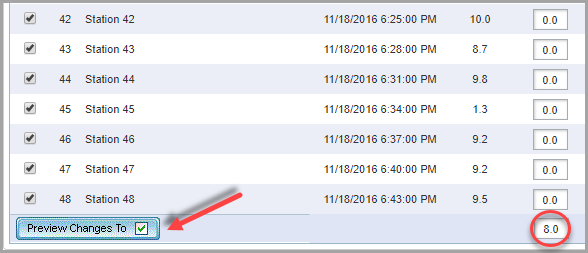
4. Scroll to the bottom of the section and enter the desired flow rate into the flow rate field as shown below, then click Preview/Changes to verify the changes.
5. Click Save & Send at the bottom of the page. A dialogue box displays asking you if you want to save and send the changes to the controller. Click OK.
6. Click Configure under the OptiFlow tab to return to OptiFlow Inspector.
7. Click Inspect. If the issue has been resolved, you will see a green checkmark.
To assign flow rates to individual stations
1. Within the Controller Tree, click the gear icon next to the controller name or number. The Controller Details page displays.
2. Next to Quick Links, click Program. The Program Controller page displays.
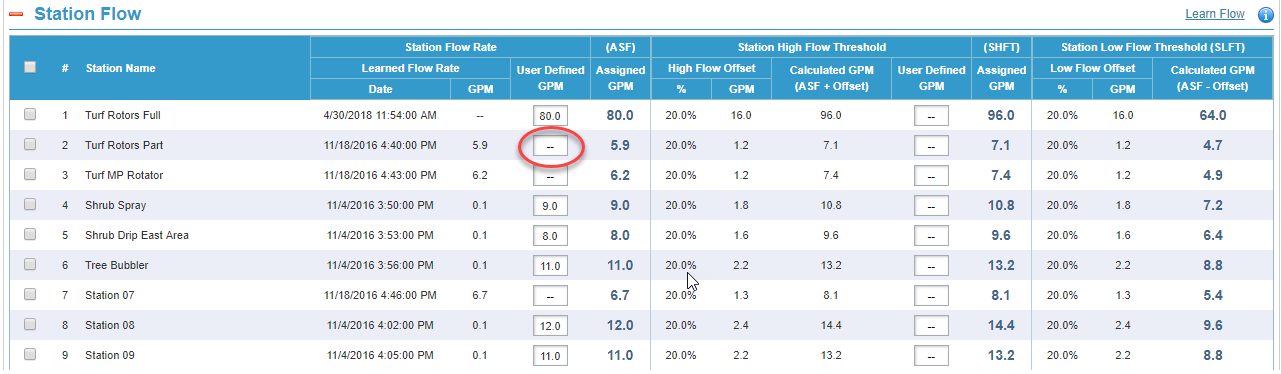
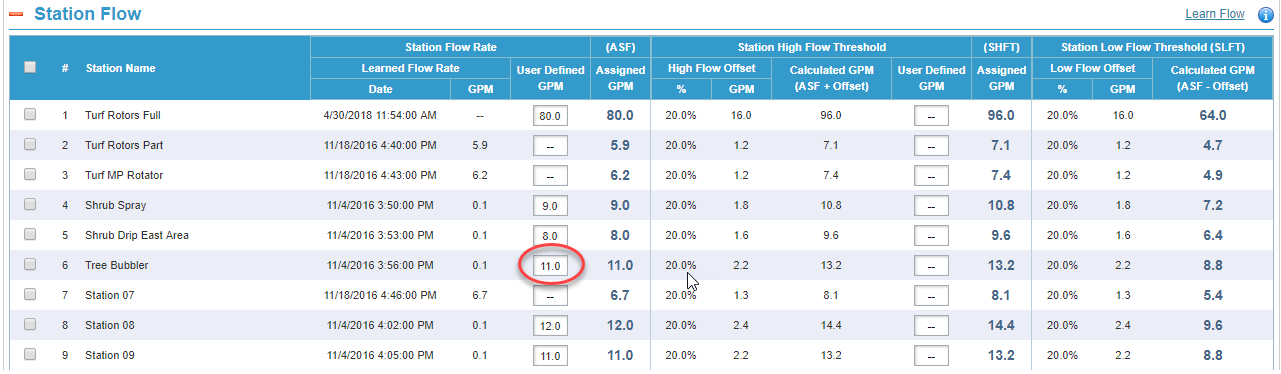
3. In the Station Flow section, assign a flow rate to individual stations by entering in the desired flow rate in the User Defined GPM field.
4. Click Save & Send at the bottom of the page. A dialogue box displays asking you if you want to save and send the changes to the controller. Click OK.
5. Click Configure under the OptiFlow tab to return to OptiFlow Inspector.
6. Click Inspect. If the issue has been resolved, you will see a green checkmark.
To assign flow rates through learn Flow
In order to assign flow rates through Learn Flow, the site must have a flow meter/sensor.
1. Within the Controller Tree, click the gear icon next to the controller name or number. The Controller Details page displays.
2. Next to Quick Links, click Program. The Program Controller page displays.
3. Click the Learn Flow tab in the blue bar at the top of the page.
4. In the Manage Flow Learning section, click the station numbers you want to learn flow on.
5. Click the Start learning button.
6. Check if the Learn Flow values were assigned correctly by either inspecting the stations flow values in the Program Controller page or in the Learn Flow page, under the Smart Irrigation Tab.
Lowering a station’s flow rate
Stations must have a flow rate that is supported by the site’s hydraulic tree. A station’s flow rate cannot exceed the rate on the mainline.
1. Within the Controller Tree, click the gear icon next to the controller name or number. The Controller Details page displays.
2. Next to Quick Links, click Program. The Program Controller page displays.
3. In the Station Flow section, find the station and lower the flow rate in the User Defined GPM field (as shown below) so it is lower than the rate on the mainline.
4. Click Save & Send at the bottom of the page. A dialogue box displays asking you if you want to save and send the changes to the controller. Click OK.
5. Click Configure under the OptiFlow tab to return to OptiFlow Inspector.
6. Click Inspect. If the issue has been resolved, you will see a green checkmark.